Easily Set Up Voicenet.com Email On The Apple iPad

Greetings everyone!
I’ve had the opportunity to speak to many of you personally and most of you have some type of portable device that you use to keep track of your email. It’s the way things are done these days. Why lug around laptops when we can carry a device with a much smaller footprint? For the everyday user an iPad is one option.
The Apple iPad is nearly iconic. While it’s not the only tablet, it is generally the first one brought up in conversation. Overall, it’s a great device, and it’s simple to setup in every aspect. The beauty of this device is how portable it is. Many people are replacing their computers with iPads. It can do most anything from browsing the internet to editing and viewing documents. A main feature that most people feel is necessary is email.
I’m going to walk you through how to set your email account up on the iPad. This tutorial is specifically set up for voicenet.com email addresses. It can be tweaked to work with any email provider as long as you can acquire the correct settings. Also, if you have a domain purchased through hostandstore.com or voicenet.com I will be explaining how to set that up throughout the tutorial as well. So lets get started shall we?
NOTE: If you have purchased a domain through HostAndStore.com or voicenet.com, I’ll explain how to set up your domain throughout the tutorial as well. So let’s get started with the following steps:
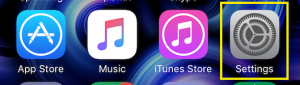
The first step is to navigate to the settings on your iPad.
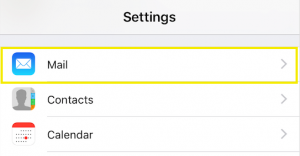
Once you’re in the settings, you can scroll down on the left navigation pane until you see “Mail, Contacts, Calendars” and click on that. =
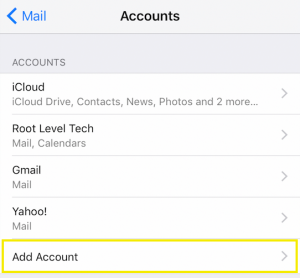
You’ll see the option to “Add Account”, so go ahead and select that.
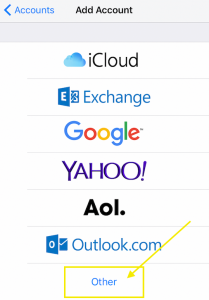
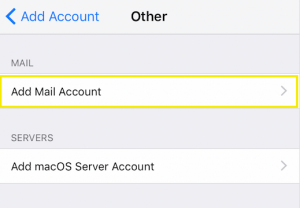
After you’ve selected “Add Account” you’ll be brought to the next set of options. There are several options, but the one we’re looking for is “Other”. It’s located at the bottom of the list.
Once “Other” has been selected, you’ll be brought to the next set of options. Here you’ll need to select “Add Mail Account”
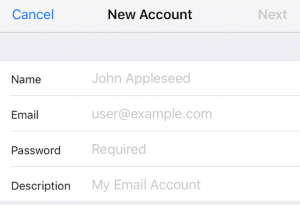
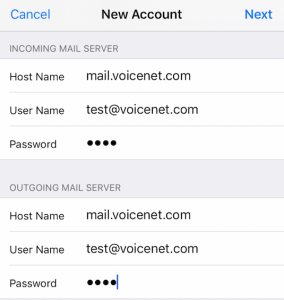
Here is where we finally get into the actual settings. A box will pop up, asking you for a few things. The most important here are your full email address, and password. The name and description is purely for your own use. These come in handy when you have several accounts that you go back and forth between. So, enter your details as outlined by the screenshot below, and select next in the top right corner.
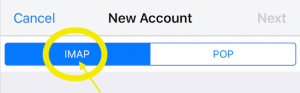
At the top of the next screen you’ll see that you can either choose “IMAP” or “POP”. I would suggest using IMAP, as its better if you need to access email from different devices.
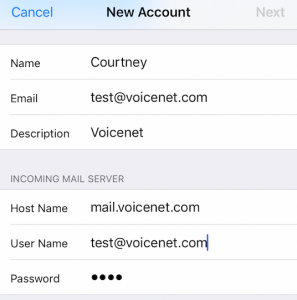
Moving on, you’ll need to have a few settings dialed in such as:
Incoming Mail Server:
Host name: mail.voicenet.com (if you’re a domain user, the host name will be mail.”yourdomain”.com, so just replace the “your domain” part with your domain)
Username: your full email address, just like mine daniel@voicenet.com
Password: The same password you would use to login to your email any other way.
For the Outgoing Mail Server, it will be the exact same settings.
After you input these settings properly, click next in the top right. This will bring you to the next set of options. The two options on this screen are “Mail” and “Notes”. The only one you need is mail, so tap the switch to the right of “Notes” to turn that off.
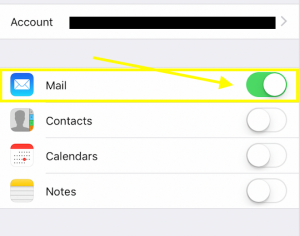
Once this is done click save. We’re almost finished. We are back to the “Mail, Contacts, Calendars” section of the settings menu. You should now see your newly added email account in your list of accounts.
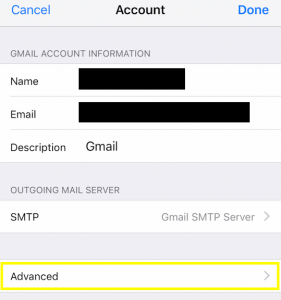
Click on the account you just added. We’ll need to make a few more changes for it to function properly. Once you’ve selected the account, there will be a screen that looks like the screenshot below.

Click on the box that says “Account” and has your email address. This will bring you back into the menu from before that we set up the hostnames for the incoming and outgoing servers, but this time, there is an option at the bottom called “Advanced”, so click on that.
Scroll down to the bottom of the advanced options window and you’ll see a section that’s called “Incoming Settings”. Within this section you’ll need to turn off the “Use SSL” option by tapping the switch on the right side.
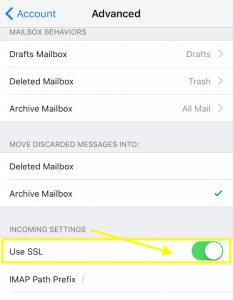
You have now successfully set up an email account! You should now be able to go into your inbox and see your messages.
As always, if you have any questions or issues, feel free to put in a support ticket by emailing Support@hostandstore.com.