Hey everyone. Hope you are all well.
Many of you are Windows users and have been for many years. Chances are you’ve used outlook and may even still be using it. Microsoft Outlook is one of the most commonly used email clients. It was previously bundled with Windows in an “express” version, and there is also a more robust “full” version. Presently, you cannot obtain a copy of outlook with a new computer, unless you buy a copy of Microsoft Office. Windows 8 now comes with a much simpler email client called “Mail”. If you’ve been using Outlook for years, “Mail” more than likely won’t cut it.
We get calls about email setup at least once a day, and a good percentage of those requests are for Outlook. In an attempt to streamline your experience, I’ve decided to go through a detailed setup, and explain everything with screenshots for your convenience. Outlook can be daunting, but we’ll get through this together.
From my experience with this company, I’ve noticed many people are still using copies of Outlook 2010, so I’ve decided to use that for our tutorial. Don’t worry if you’re using something newer, its basically the same. Lets get started, shall we?
Step 1:
Begin by clicking on the “File” tab at the top of your screen. By default, it will show the “info” tab when you click file, and this is where we need to be.
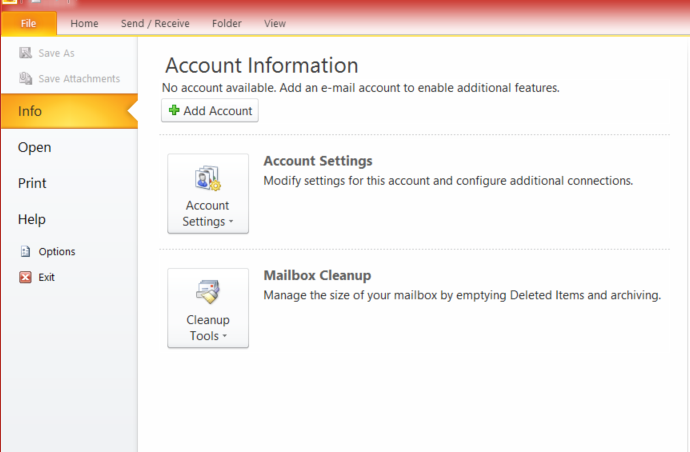
Go ahead and click the “Add Account” button with the green + sign next to it.
Step 2:
The next screen will ask you for your account details. Your name can be your first or full name, it’s completely up to you. Fill this set of boxes out as I’ve shown below.

Instead of clicking “Next” right away, we’ll need to check off the “Manually configure server settings or additional server types”.
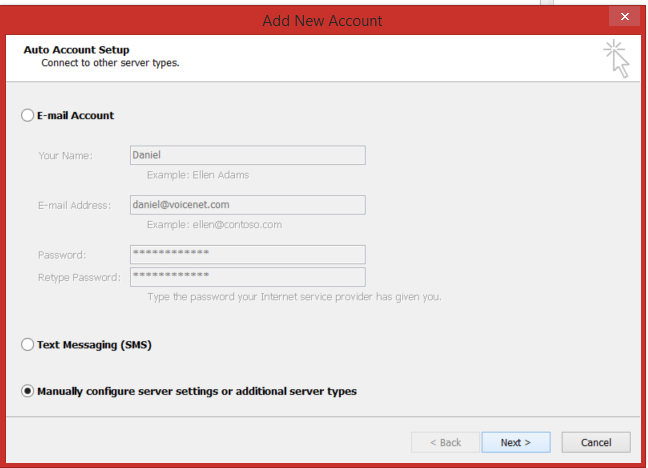
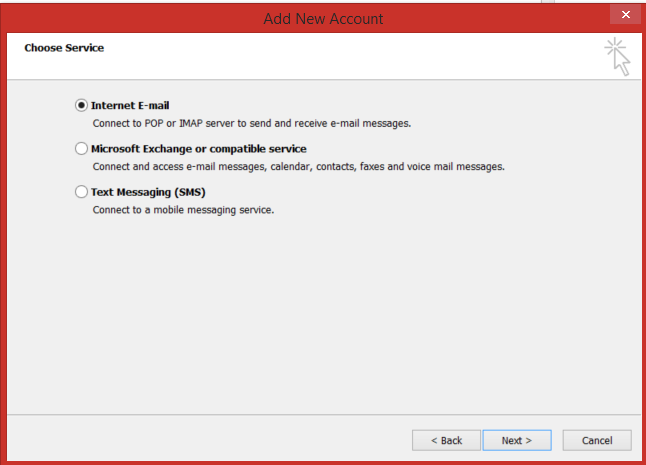
The next window will ask you what type of service you’re setting up, choose “Internet E-mail”.
Step 3:
You should now see a window that looks like this.
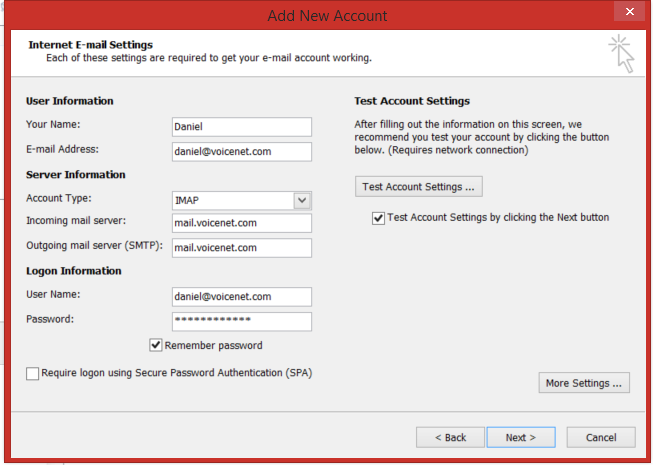
I chose to go with IMAP because that’s what I’d typically suggest using. If you want to use POP3, you can do it in the same way. Fill out the settings just like mine, but with your email and password. Before you click next, click the box that says “More Settings…”
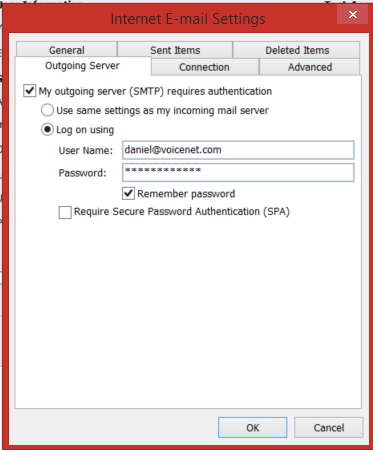
Within this section, click on the “Outgoing Server” tab, and fill it out like I’ve filled this one out. Check “My outgoing server (SMTP) requires authentication” and “Log on using”. Put in your email and password.
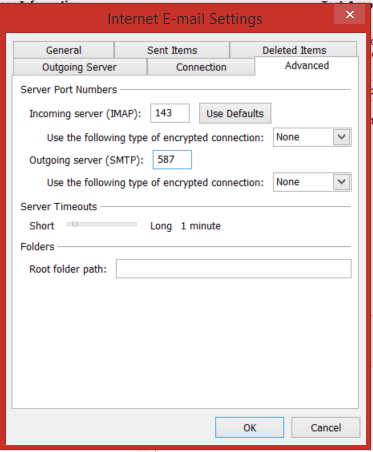
Before you click OK, click on the advanced tab as well. By default, Outlook will set the outgoing server (SMTP) port to 25. We need port 587 instead. So change that to 587 and click OK.
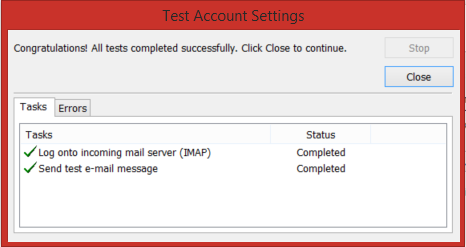
Step 4:
Once you’re back to the settings screen, click “Next” at the bottom. This will prompt a “Test Account Settings” window. If you get 2 green check marks, as shown below, you’re good to go. Click the close button. If not, something went wrong during the setup and you’ll need to go back through the steps to make sure there isn’t a mistake.
Step 5:
Click the “Finish” button, and you’ll be brought to your inbox.

You’ve done it! You should be seeing your emails coming in, and you can now send and receive emails like a pro!
We are always here to help. If you have any questions regarding this tutorial, or anything regarding your email account in general, please let us know. I want to make your digital life as easy as possible!
If you have suggestions for tutorials, or articles that you would like to read, reach out to us. We’d be happy to give you guys what you want.
Thanks!